First you have to connect your printing account to your Google Drive account – you only have to do this once.
- Log into the AWMS User Portal – http://wshs.link/webprint
- the portal is only available when at school
- access with your school user.name and password (do not use @detnsw)
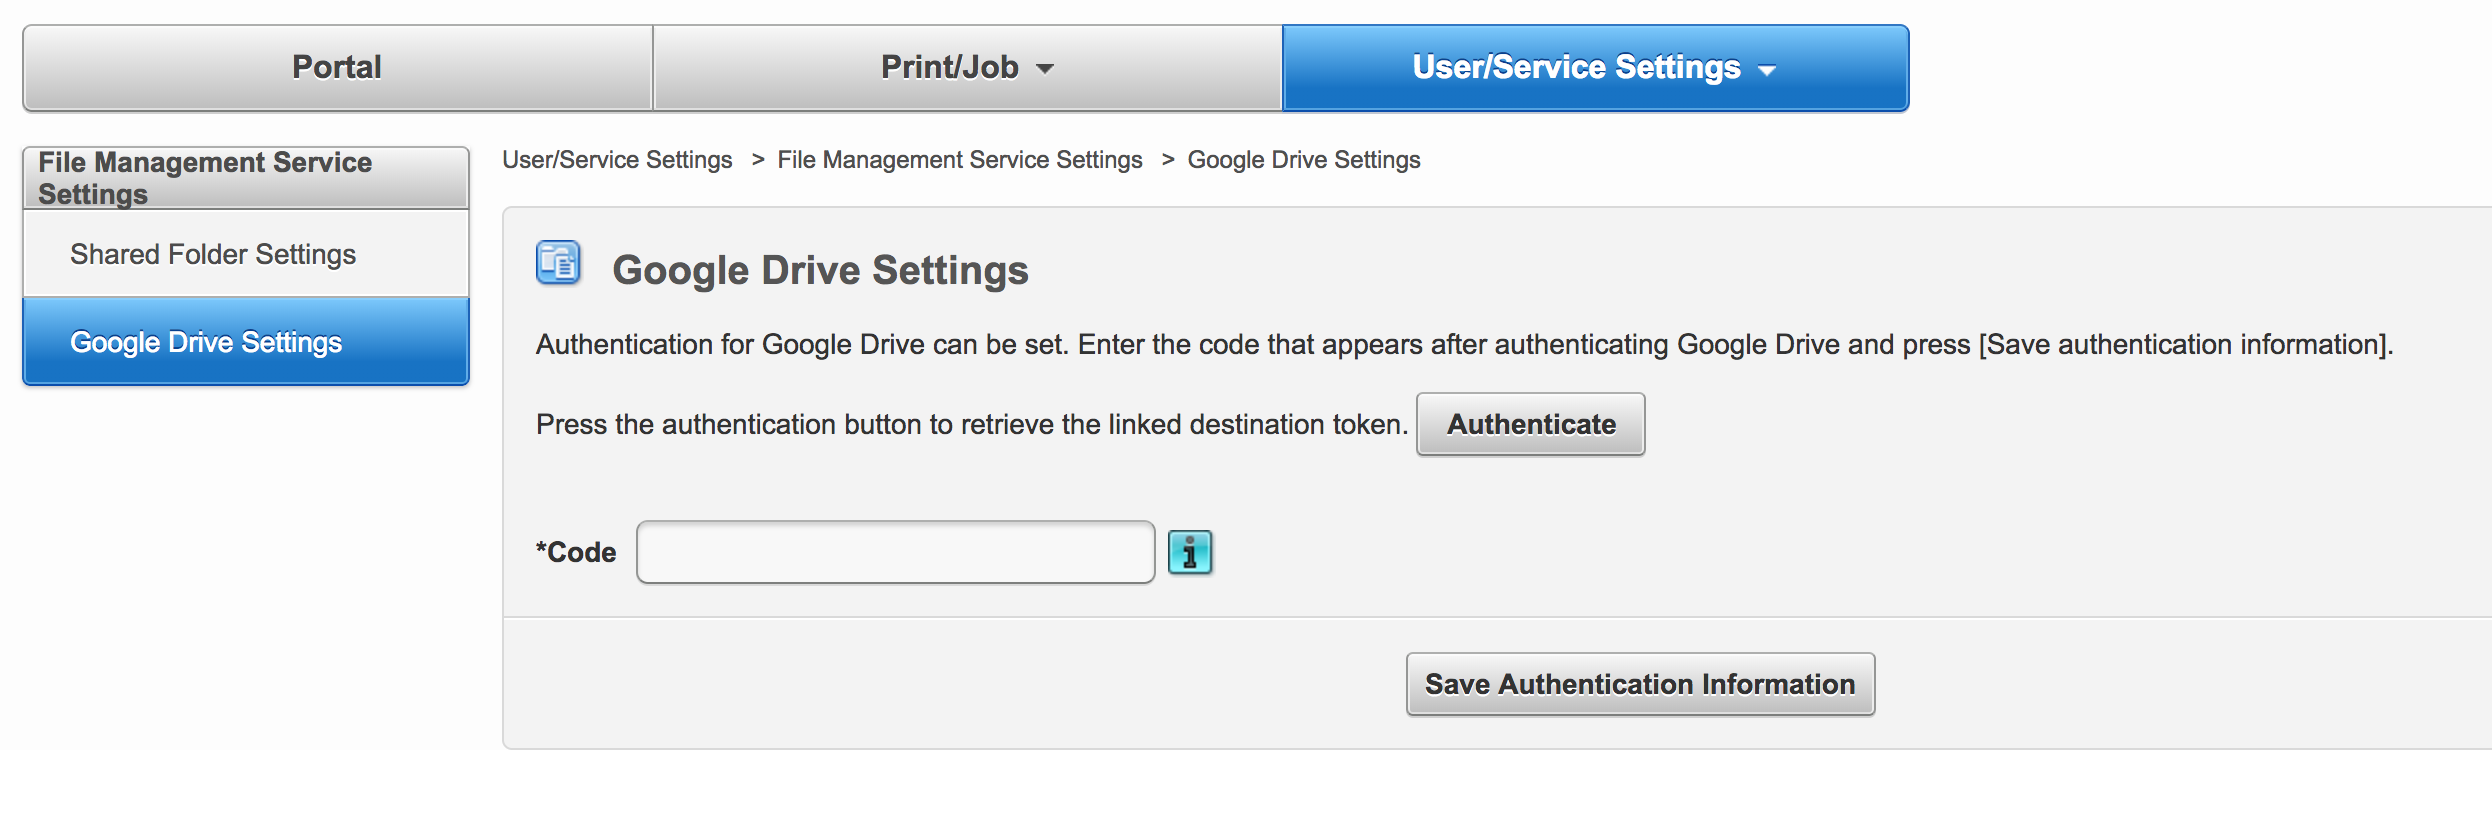
- Hover over the User Settings tab and click on Google Drive Settings – bottom left of the pop over menu.

- click the Authentication button
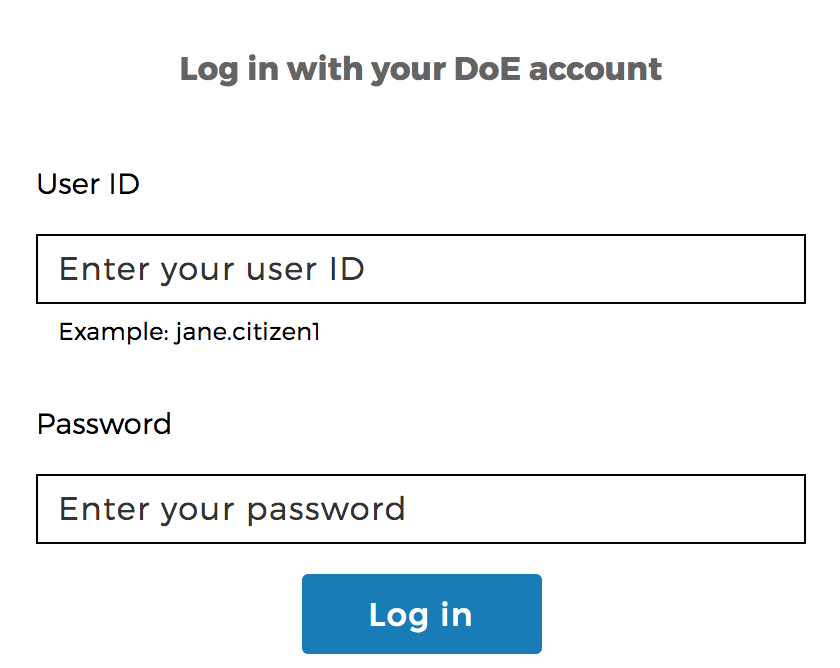
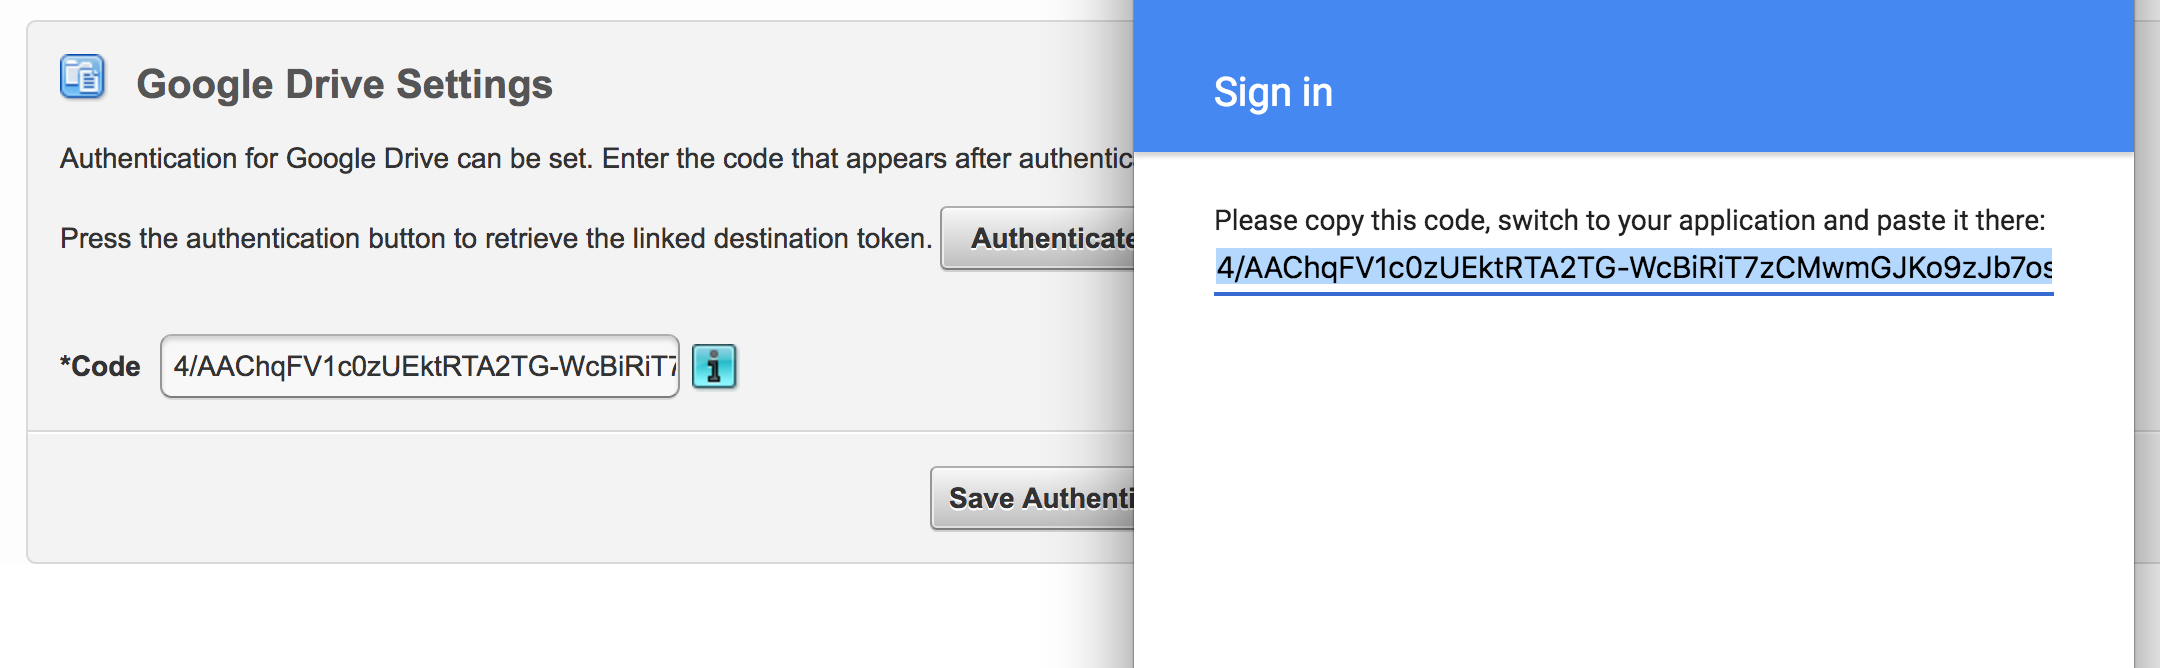
- enter your DoE user.name@education.nsw.gov.au and click Next
- enter your DoE user.name and password (no @detnsw this time!) and click Log in
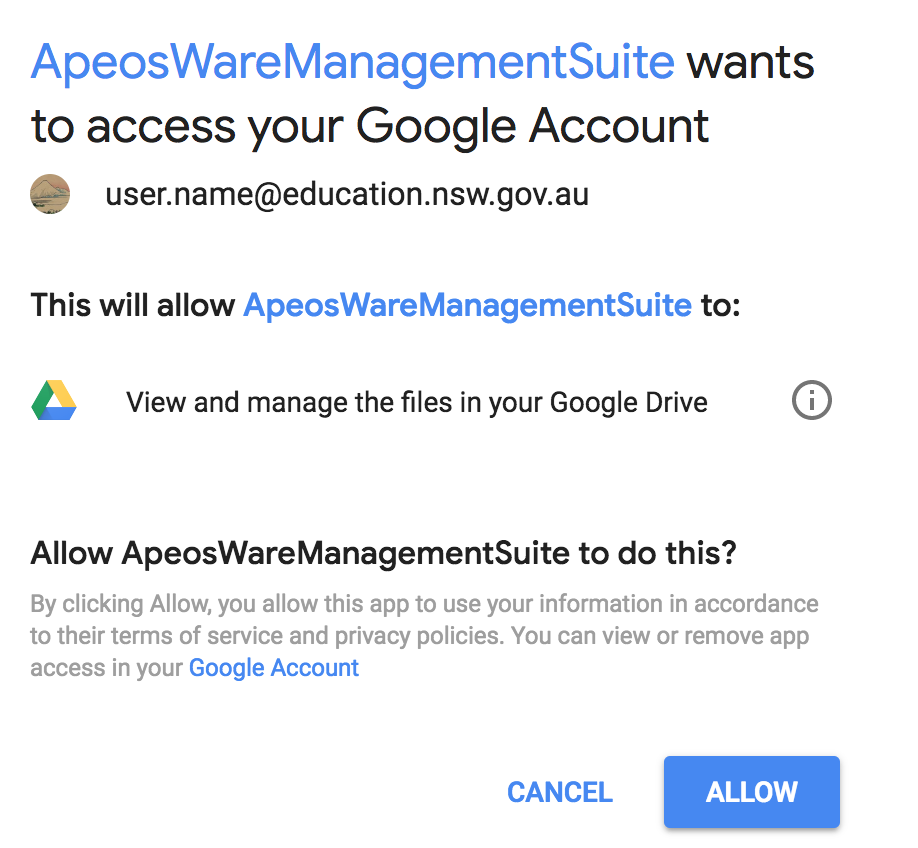
- confirm that it is your account and click Continue
- make sure that the request is from ApeosWareManagementSuite, that it shows your DoE user.name (example below) and click Allow
- copy the code provided and paste the code into the *Code box and click Save Authentication Information
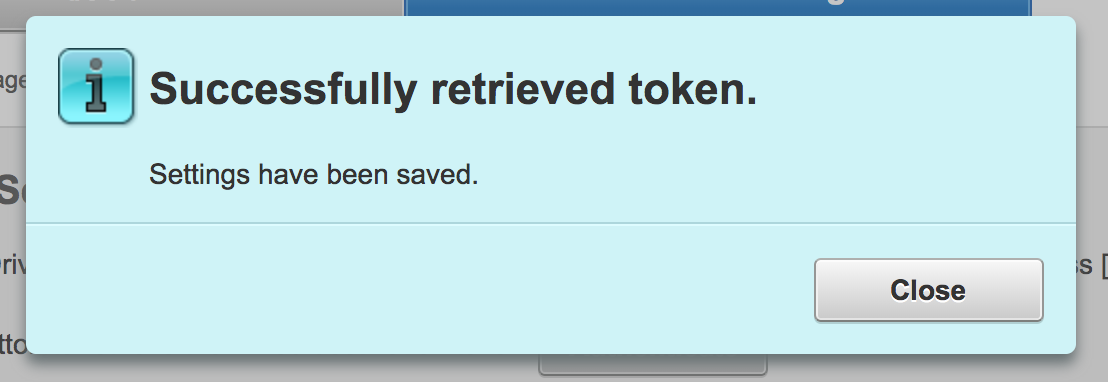
- Wait while the system links to Google Drive and if successful you will see the message below
- Click Close and then Logout when set up has finished.
- Remember: you only have to set this up once.


Print From Google Drive at a copier
- Make sure you have already set up Google Drive in the Printing Portal (see above) before attempting to print at the copier.
- Tap into the copier with your ID Card
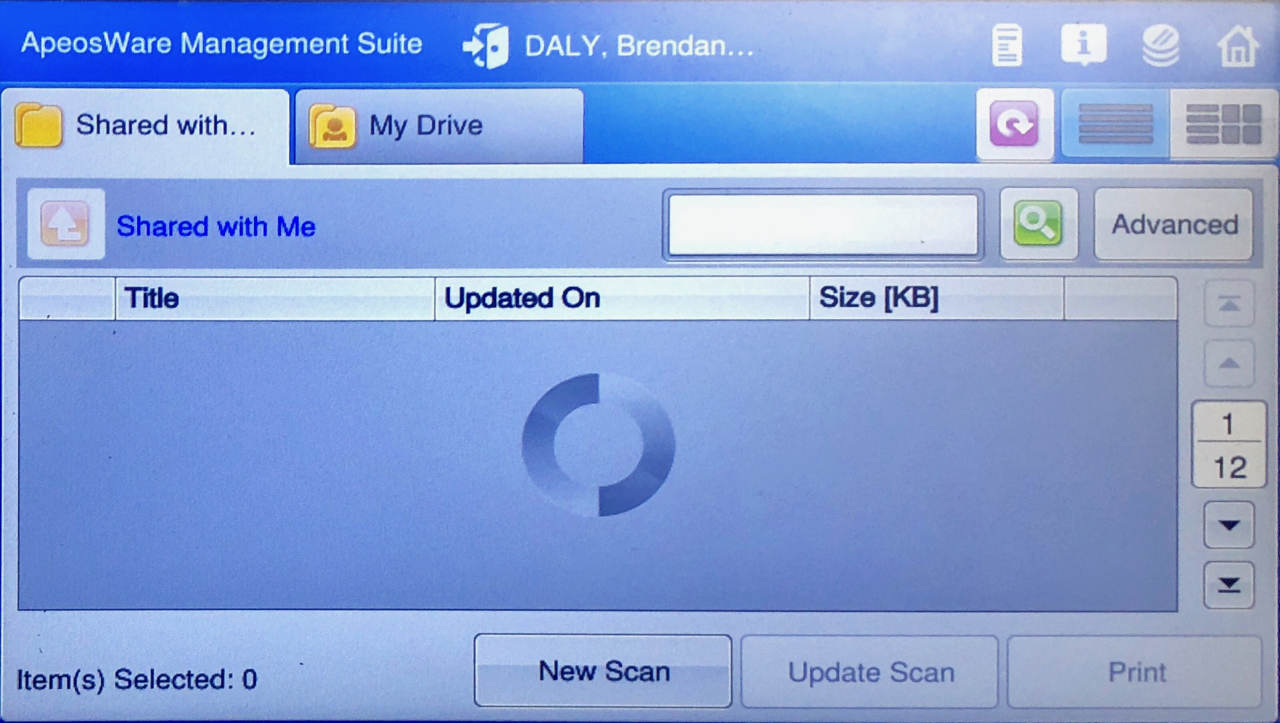
- tap on the Google Drive icon
- Choose which folder to work on (Shared with me or My Drive) by tapping on the appropriate tab. Wait until the spinning loading icon (and green loading bar if it appears) has disappeared before tapping anything else.
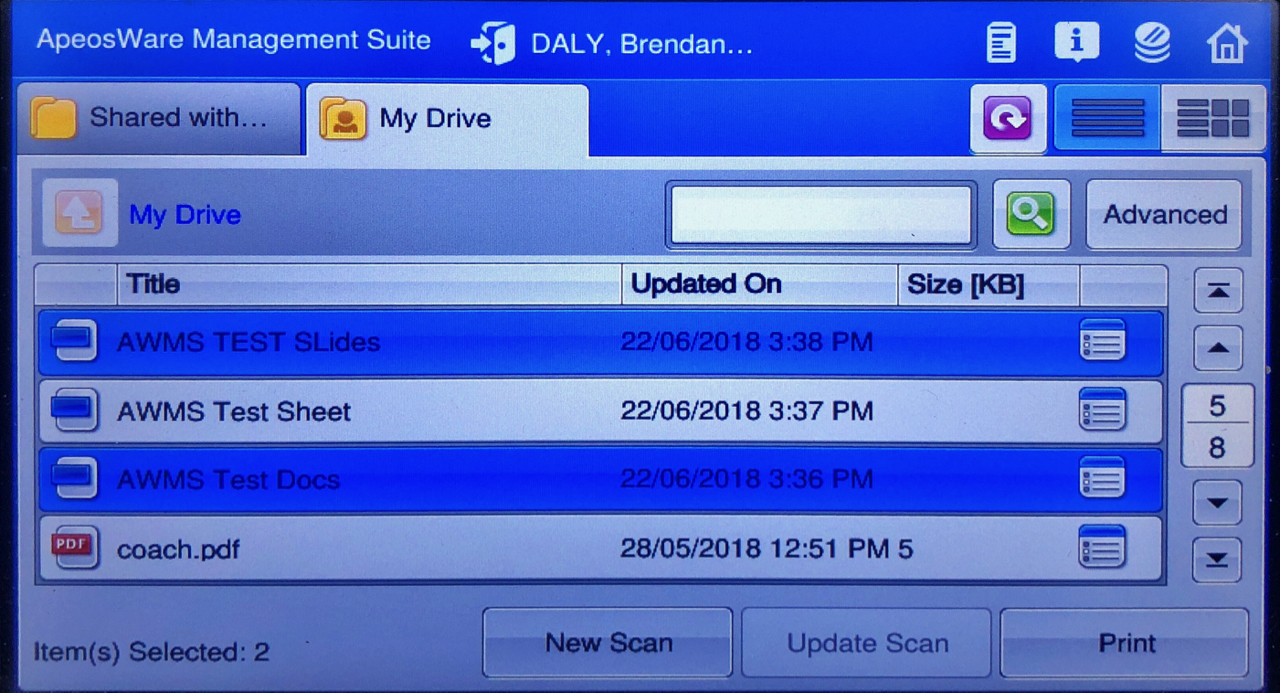
- Once the list is loaded navigate through the list to the appropriate folder/files you wish to print.
- Tap on each file you want to print.
- the following file formats have been tested and found to work:
- Office: Word, Excel, Powerpoint
- Images: JPG, PNG
- native Google files: Docs, Sheets, Slides and Drawings!!
- the following file formats have been tested and found to work:
- Once you have the files selected tap on the Print button
- You will then be presented with some limited options to change
- single or double sided, colour or black and white, output paper size and quantity (number of copies)
- the settings apply to all the documents you currently have selected
- I would encourage you to select the paper output size but it is optional
- click Print and the selected files will be printed
- Large files will take longer to download, process and print.

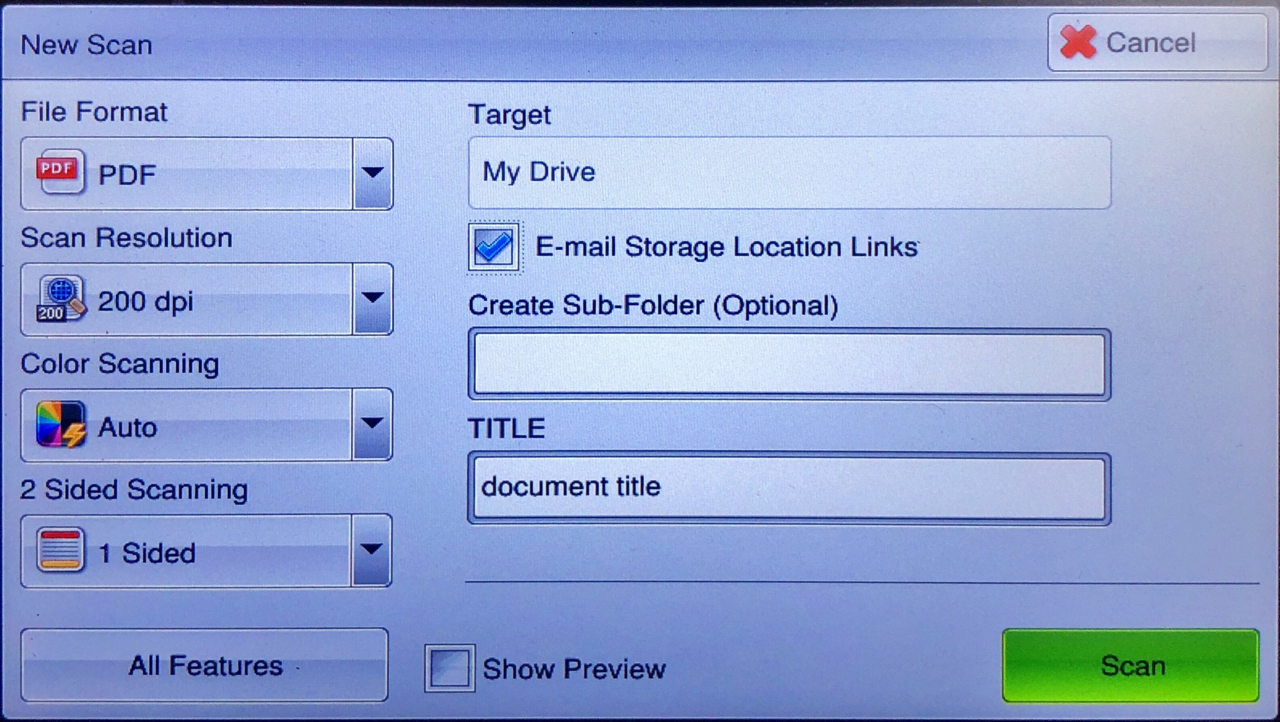
Scan to Google Drive at a copier
- Make sure you have already set up Google Drive in the Printing Portal (see above) before attempting to scan at the copier.
- Tap into the copier with your ID Card
- tap on the Google Drive icon
- Choose which folder to work on (Shared with me or My Drive) by tapping on the appropriate tab. Wait until the spinning loading icon (and green loading bar if it appears) has disappeared before tapping anything else.
- Navigate to the folder you wish to save the scan into
- the folder you can see on the screen is the one that the scan will be saved to
- you are able to create a subfolder at scan time but you will always work in the folder you can see on the screen
- you can search by tapping on the empty box next to the green magnifying glass icon
- Once you are in the correct folder click New Scan
- There are many options on the New Scan screen (see below)
- If you require extra settings tap on the All Features button
- make sure you select a TITLE
- if you check the box next to E-mail Storage Location Links then, after the scan, you will be sent an email which will contain a link to the file you just scanned.
- the link will be mailed to your school email account
- the title will be: <ApeosWare Management Suite> Scan Document Storage Notices
- the link will download the file to your default download location (your browser may open the file in the browser depending on your browser settings)
- once everything is set as you like it click Scan
- the upload will be finished once the data light on the right of the copier goes out.
- You can log out once the scan is completed and the upload will continue in the background.